Now, let’s get started!
1 ) Register a Google Adsense account with your existing Google account. Once you successfully activate your Google Adsense account, it will take you to the dashboard. You must verify your blog by uploading Google’s HTML file to your server. Once Google verified your blog, you can then create the ads.
Since you’re using our theme, please paste the code in the Genesis > Theme Settings > Header Script field.
2 ) Go back to your Google Adsense dashboard > “MY ADS” > “Ad Unit”.

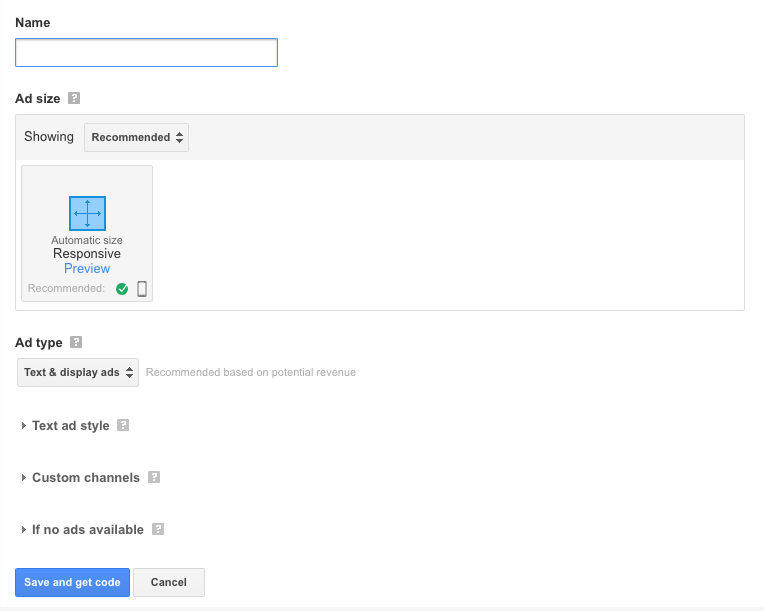
3 ) Select the type of ad you’d like to create. “Text & display ads” and “In-artcle ads” are the common ad you see on almost every website. If you’re not sure, go for the “Text & display ads”.

4 ) Give whatever name you want to the ad unit. It won’t affect your ads and your blog. Choose the ad size that fits your blog. If you’d like to place the ad to your sidebar, normally go with the 300 X 600. Again if you’re not sure, choose the responsive size. You could choose the text color and background color of the ad here too. Once you’re happy with the settings, click the “Save and get the code” button.

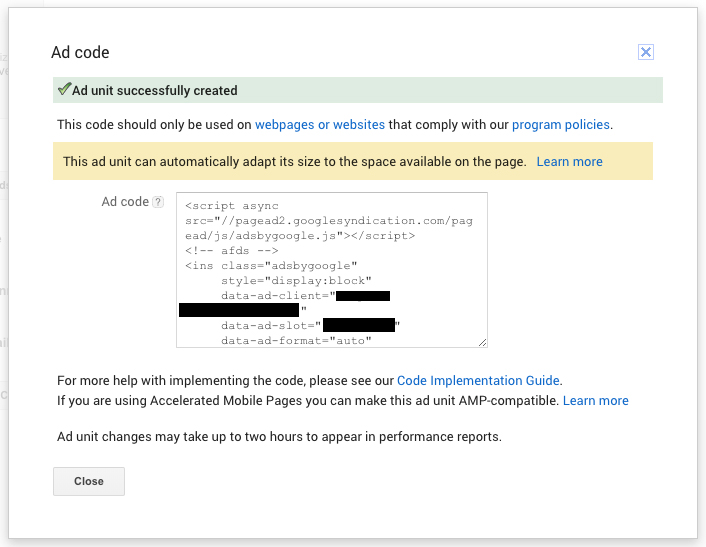
5 ) This block of code is your ads code with your unique client ID. Copy the entire code.

6 ) There are 2 easiest ways to implement the ads to your WordPress blog.
Sidebar
Drag a text widget to your sidebar area > click the text tab and paste the ad code in it then hit the save button.
Content
Go to the edit blog post page > click the “PLUS” button to add a new block. Enter “Custom HTML” in the search field OR scroll down the page until you see the “Formatting” menu and click the “Custom HTML”. Paste the Google Adsense code inside the block.

That’s it!
You might noticed that your ads doesn’t appear immediately, that is because Google needs to approve the ads before it goes live. It takes up to a week. There are various reasons Google won’t approve your ads but the only tip we could give you is let everyone knows you have a new blog post. When the blog post hit certain pageview, usually your ad will goes live.