Adding category to your menu bar allows your readers easily navigate what they’re looking for from your blog. But before you could add them to your blog posts and menu bar, you have to create it.
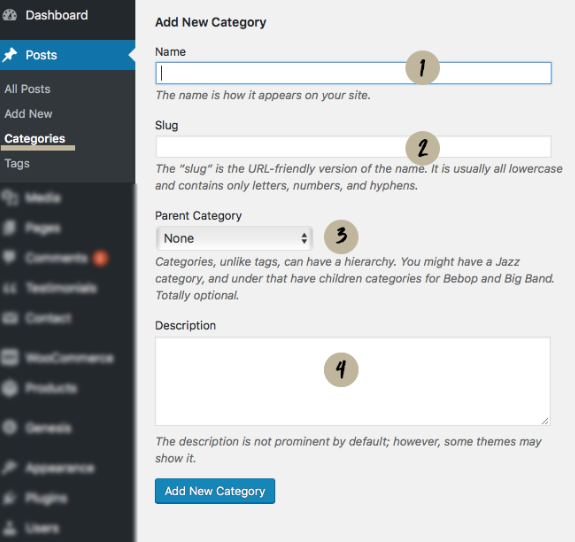
Go to your WordPress dashboard > Posts > Categories. You’ll see the following settings panel.
1 ) Name
The title of your category.
2 ) Slug
This will generate automatically by the system base on the name of the category once you hit the “ADD NEW CATEGORY” button. Of course you could enter the text you’d prefer.
3 ) Parent Category
Select the parent category for the category. The parent category will display all of its child categories blog posts on the same page.
4 ) Description
Explain what the category is about. By default, it will be hidden from the page.
Now go back to your Dashboard > Appearance > Menus page. Expand the category panel on the left hand side, you’ll see all of the categories you just created. Select the categories that you’d like to display on the menu and click the “ADD TO MENU” menu button then save the menu.

